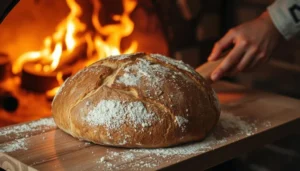
The kitchen fills with a warm, tantalizing aroma as golden sourdough bread emerges from the oven. This isn’t just bread, it’s a labor of love. It connects us to centuries-old baking traditions that turn simple ingredients into something magical. Sourdough bread is more than just food; it’s an art form that invites you to explore the world of artisan baking.
Creating authentic sourdough bread is a journey of patience, precision, and passion. Unlike commercial breads, this fermentation process creates a unique flavor profile. Commercial yeast can’t replicate it. Each loaf tells a story of wild yeast, carefully cultivated bacteria, and traditional bread-making techniques.
Whether you’re a seasoned baker or a curious newcomer, this guide will help you craft incredible sourdough bread from scratch. You’ll learn how to develop a robust starter, understand fermentation processes, and bake bread that will impress even the most discerning palates.
Prepare to transform your kitchen into a sanctuary of sensory delights. Your sourdough adventure begins now.
Table of Contents
Understanding Sourdough: A Natural Fermentation Process
Sourdough bread is a special tradition that turns simple ingredients into something amazing. It uses a wild yeast starter, unlike commercial bread. This starter adds unique qualities to every loaf.

What Makes Sourdough Different from Regular Bread
The magic of sourdough is its natural rising process. Unlike commercial bread, it uses wild yeasts and bacteria. This natural process gives sourdough its tangy taste and crusty texture.
- Uses natural wild yeast starter instead of commercial yeast
- Develops deeper, more complex flavor profiles
- Creates a more digestible bread structure
The Science Behind Wild Yeast and Bacteria
Your sourdough starter is a living mix of microorganisms. Wild yeasts and lactic acid bacteria work together. They break down flour, creating carbon dioxide that makes the bread rise.
| Microorganism | Function | Impact on Bread |
|---|---|---|
| Wild Yeasts | Produce carbon dioxide | Creates bread’s rise and texture |
| Lactic Acid Bacteria | Produce organic acids | Develops tangy flavor |
Health Benefits of Fermented Bread
Fermented sourdough is more than just tasty. The long fermentation process breaks down gluten, making it easier to digest. It also boosts nutrient availability and offers probiotics that help gut health.
- Improved digestibility
- Enhanced nutrient absorption
- Potential prebiotic benefits
Essential Tools and Ingredients for Perfect Sourdough Bread
Making great sourdough sandwich bread needs more than just ingredients. You’ll also need special tools to turn whole grains into a tasty loaf. A good digital scale is key, and you can find affordable ones for under $15. They help you measure ingredients accurately.

- Digital kitchen scale
- 8-10 inch banneton (proofing basket)
- Glass jar for starter storage
- Dutch oven with lid
- Bread lame for scoring
- Parchment paper
- Sharp bread knife
When picking flours, try different types like kamut and whole grains. King Arthur unbleached bread flour is popular, but trying new flours can add unique tastes.
| Tool | Purpose | Recommended Type |
|---|---|---|
| Digital Scale | Precise ingredient measurement | Accuracy within 1 gram |
| Banneton | Dough proofing | 8-10 inches diameter |
| Dutch Oven | Baking vessel | Cast iron with tight-fitting lid |
Most sourdough fans suggest using parchment paper when moving dough. They also recommend keeping your oven at 450°F for the best crust.
Creating and Maintaining Your Sourdough Starter
Starting your journey in traditional breadmaking means learning about sourdough starters. This mix of wild yeast and bacteria is key to making real bread. It’s a big part of the slow food movement.

Building a strong sourdough starter takes time, consistency, and knowing its quirks. It might seem hard at first, but with the right steps, you’ll have a starter that makes amazing bread.
Feeding Schedule for a Healthy Starter
To keep your starter healthy, follow a regular feeding plan. Here’s what works:
- Room temperature starters: Feed every 12-24 hours
- Refrigerated starters: Feed once a week
- Daily bakers: Feed twice daily (morning and evening)
Signs of an Active Starter
A good sourdough starter shows it’s alive in these ways:
- Doubles in size within 4-12 hours after feeding
- Has lots of bubbles
- Smells slightly tangy and nice
| Starter Condition | Feeding Ratio | Recommended Temperature |
|---|---|---|
| Active Daily Use | 1:1:1 (Starter:Flour:Water) | 75°F (23°C) |
| Occasional Baking | 70g white flour, 30g rye flour | Refrigerated storage |
Troubleshooting Common Starter Issues
If your starter seems slow, don’t worry. Persistence is key in traditional breadmaking. If it’s not rising or seems dead, try these fixes:
- Make sure to feed it at the same time every day
- Use fresh, good-quality flour
- Keep the room at the right temperature
- Refresh it if there’s no activity after a few days
Every sourdough starter is different. Your care and patience will turn it into a lively, tasty culture. It will connect you to breadmaking traditions for centuries.
The Basic Sourdough Bread Recipe: Measurements and Ratios
Making perfect sourdough bread starts with knowing the right measurements and ingredient ratios. Your journey into making artisan bread begins with a recipe that turns simple ingredients into a tasty loaf.
Here’s a detailed list of the key ingredients for your sourdough bread:
| Ingredient | Quantity | Purpose |
|---|---|---|
| Bread Flour | 500g | Primary structure and protein content |
| Water | 375g | Hydration and gluten development |
| Sourdough Starter | 50-100g | Natural leavening agent |
| Sea Salt | 11g | Flavor enhancement |
Recent studies on sourdough bread and cancer show it might have health benefits. The long fermentation breaks down proteins, making the bread easier to digest and possibly reducing inflammation.
- Total hands-on preparation time: 25 minutes
- Dough mixing time: Less than 5 minutes
- Recommended starter feeding ratio: Equal parts flour and water by weight
Pro tip: Don’t waste leftover sourdough! Turn it into sourdough bread pudding. It’s a tasty way to reduce kitchen waste.
The secret to great sourdough is knowing your ingredients and how they work together. Your starter should double in size in 4-8 hours after feeding. This shows it’s ready for bread-making.
Mastering the Art of Dough Mixing and Development
Making perfect sourdough bread needs precision and knowing how to mix and develop dough. Whether you want a classic loaf or try blueberry or zucchini sourdough, getting good at mixing and development is key.
Mixing dough is more than just putting ingredients together. It’s a careful process that turns simple ingredients into a delicious, textured bread.
The Importance of Proper Hydration
Hydration is very important for sourdough bread. The right amount of water, between 65% to 75%, affects the dough’s:
- Texture
- Elasticity
- Fermentation process
- Final bread structure
Stretch and Fold Techniques
The stretch and fold method is a big improvement for building gluten. Unlike kneading, it builds dough strength gently.
- Do stretches every 30-45 minutes at the start
- Lift and fold the dough over itself gently
- Rotate the bowl for even development
- Do this 4-6 times per session
Building Gluten Structure
A strong gluten network is crucial for airy, open crumb sourdough bread. Using high-protein flour and the right mixing techniques will help you get the perfect structure for all kinds of breads, including blueberry sourdough.
Pro tip: Patience and consistent practice are key to mastering sourdough bread development!
Bulk Fermentation: Timing and Temperature Control
Bulk fermentation is key to making tasty sourdough bread. It turns your dough into a flavorful base for sandwiches. Getting the temperature and timing right is essential for success.
Temperature is crucial for fermentation. The best range is 74 to 78°F (23 to 25°C). This helps your dough develop great flavor and structure. Warmer temps speed up fermentation, while cooler temps slow it down.
Key Fermentation Parameters
- Warm bulk fermentation: 2 to 5 hours
- Cold bulk fermentation: 4 to 24 hours
- Desired dough temperature: 75-78°F
- Stretch and fold technique: 4 times per set
Watch for these signs of active fermentation:
- Increased volume (about 50-75% rise)
- Bubbles throughout the dough
- Soft, puffy texture
- Slight jiggle when container is moved
| Container Type | Dough Weight | Recommended Use |
|---|---|---|
| Rectangular Glass Dish | 500-1000 grams | Single loaf fermentation |
| Large Serving Bowl | 500-2000 grams | Medium batch fermentation |
| Rubbermaid Tub | 2000-8000 grams | Large batch fermentation |
Pro tip: Use a clear container to easily track your dough’s progression during bulk fermentation.
Shaping Your Sourdough Bread for Perfect Results
Turning your sourdough dough into a beautiful loaf takes skill and care. Shaping is key for a sourdough bread bowl recipe that looks and feels great.
Learning to shape bread is about mastering several important techniques. It’s not just about making dough. It’s about building structure and tension on the surface.
Pre-Shaping Techniques
Pre-shaping is the first step to your final loaf. Here are the essential steps to get your dough ready:
- Gently divide the dough without deflating it completely
- Allow the dough to relax outward by approximately 30%
- Use gentle folding motions to create initial structure
Final Shaping Methods
Each bread shape needs its own special technique. For stonehouse sourdough bread, pay attention to what causes black speckles. These speckles often come from whole grain flour or added seeds.
- Boule (round) shape: Ideal for tight interior crumb
- Batard (oval) shape: Creates beautiful elongated loaves
- Baguette: Requires precise handling for thin, crispy crust
Creating Surface Tension
Surface tension is key for a perfect rise and crust. Techniques like stitching and cinching help create a tight outer skin. This skin supports great oven spring.
| Shaping Technique | Purpose | Best For |
|---|---|---|
| Stitching | Adds structure to slack dough | Softer, wetter doughs |
| Cinching | Encourages open crumb | High-hydration breads |
Remember, practice makes perfect. Every loaf you shape will help you get better at sourdough bread crafting.
Proofing and Scoring: The Final Steps Before Baking
Getting your sourdough bread ready for the oven involves two key steps: proofing and scoring. These steps are crucial, whether you’re baking traditional sourdough or garlic bread using sourdough. They can greatly affect your bread’s final look and taste.
Proofing is the last rise that enhances your bread’s flavor and texture. You can choose from two main proofing methods:
- Room Temperature Proofing: 1-4 hours at 74-76°F
- Cold Proofing: 8-16 hours in the refrigerator at 39°F
If you’re looking for a no starter sourdough bread recipe, keep in mind that proofing times might differ. The dough should look puffy and feel soft when pressed to be perfectly proofed.
| Proofing Method | Temperature | Typical Duration |
|---|---|---|
| Warm Proofing | 74-80°F | 1-3 hours |
| Cold Proofing | 39°F | 8-16 hours |
Scoring is an art that makes your bread look great and helps it rise better in the oven. Use a sharp razor blade at a 45-degree angle for precise cuts. A single deep slash down the middle is usually best for home bakers.
Pro tip: Dust your blade with rice flour to avoid sticking and get crisp scoring lines. Aim for a cut that’s about ¼ to ½ inch deep. This will help your bread expand nicely in the oven.
Baking Techniques for a Perfect Crust and Crumb
Baking sourdough bread is an art that needs precision and understanding. It’s about turning dough into a masterpiece. Whether you’re making sourdough banana bread muffins or a classic loaf, the baking process is key. It helps get that golden, crispy crust and a tender, airy crumb.
Professional bakers know that making perfect sourdough is more than mixing ingredients. The baking method greatly affects your final product. This is true, even with delicate recipes like sourdough brioche bread.
Dutch Oven Magic
The Dutch oven method is a game-changer for home bakers. It traps steam during the initial baking phase. This is crucial for a crisp, caramelized crust. Here’s why it works:
- Creates a humid baking environment
- Helps develop maximum oven spring
- Prevents premature crust formation
Steam Generation Secrets
Steam is key to a professional-looking loaf. If you don’t have a Dutch oven, try these alternatives:
- Spray water into the oven before baking
- Place a water-filled tray on the bottom rack
- Use lava rocks to create moisture
Temperature Control Strategies
Precise temperature management is crucial for sourdough. Here are some temperature insights:
| Baking Stage | Temperature | Duration |
|---|---|---|
| Initial Baking (Covered) | 475°F (246°C) | 30 minutes |
| Final Baking (Uncovered) | 450°F (232°C) | 10-15 minutes |
Pro tip: Use an instant-read thermometer to check if your bread is done. It should be between 190-210°F for perfect doneness.
Storage and Serving Suggestions
After baking your sourdough bread, it’s important to store it right. This keeps its flavor and texture at their best. Whether you made a classic loaf or sourdough monkey bread, proper storage is key.
Let your bread cool completely on a wire rack before storing. This step stops moisture buildup and keeps the crust perfect. Sourdough bread stays fresh for 5-7 days when stored properly.
Storage Methods
- Room temperature storage in a bread box
- Airtight container for softer breads
- Cloth or linen bags for crusty loaves
- Freezing for long-term preservation
Freezing Your Sourdough
Freezing is a great way to keep your bread fresh longer. For potato sourdough bread or any sourdough, follow these steps:
- Slice the bread before freezing
- Separate slices with parchment paper
- Store in a freezer-safe bag
- Freeze for up to one month
Reheating Tips
To revive your bread, spritz it with water and warm it in the oven at 350°F for 15 minutes. This works well for sourdough monkey bread and other types.
| Storage Method | Duration | Best For |
|---|---|---|
| Room Temperature | 3-5 days | Soft sourdough breads |
| Bread Box | 5-7 days | Crusty artisan loaves |
| Freezer | 1 month | All sourdough types |
Pro tip: Always check for any signs of mold before consuming stored bread. When in doubt, discard the loaf to ensure food safety.
Browse our categories
Conclusion
Learning to make sourdough bread is more than just a recipe. It connects you to a long history of breadmaking. This tradition goes back thousands of years, to ancient times.
Every loaf you bake is a link to the past. It carries the knowledge of those who came before us. They knew the secret of fermentation.
Sourdough is a living thing. The yeast and bacteria in your starter make simple ingredients into something special. By using slow fermentation, you’re keeping a tradition alive.
This tradition is older than commercial yeast. It shows the beauty of natural food preparation. It’s a way to slow down and appreciate the process.
By making sourdough, you’re part of a movement. It values quality, health, and connection. Sourdough is good for you, with less sugar and easier to digest.
It also means you can use less salt. Every loaf you make is a chance to learn and grow. It’s a way to understand food better.
Keep trying new things and sharing your sourdough stories. Your path is unique, and each loaf has its own tale. Don’t worry about mistakes, but celebrate your successes. Enjoy the journey of making something special with your own hands.
FAQ
What is sourdough bread and how is it different from regular bread?
Sourdough bread uses wild yeast and bacteria for fermentation. This makes it tangy and more complex than regular bread. It’s also easier to digest and has a unique texture.
How do I create and maintain a sourdough starter?
Start with flour and water. Mix them together and let it sit. Feed it daily with fresh flour and water. It will become bubbly and smell sour in 5-7 days.
Is sourdough bread healthier than regular bread?
Yes, sourdough is healthier. The fermentation process breaks down phytic acid, making nutrients easier to digest. It also has a lower glycemic index, which helps control blood sugar. It might be better for those with mild gluten sensitivities too.
How long does it take to make sourdough bread?
Making sourdough bread takes 24-36 hours. This includes starter preparation, mixing, fermentation, and baking. Much of this time is spent waiting for fermentation to develop flavor and texture.
Can I make sourdough bread without a Dutch oven?
Yes, you can make sourdough bread without a Dutch oven. Use a baking stone with a water tray for steam. Or try a pizza stone or a baking sheet with a metal pan for moisture. Steam helps create a crispy crust.
How do I store sourdough bread to keep it fresh?
Store sourdough bread in a paper bag or bread box at room temperature for 2-3 days. For longer storage, slice and freeze it in an airtight container. Thaw at room temperature or briefly toast to restore crispiness.
What causes black speckles in sourdough bread?
Black speckles come from whole grain flours, like kamut or rye. They’re natural and safe. They show that the bread is more nutritious and less processed.
Can I make flavored sourdough breads?
Absolutely! Try adding blueberries, zucchini, garlic, or even bananas to your sourdough. Just mix in your favorite ingredients during the mixing or shaping process.