Table of Contents
Imagine making a yummy and pretty hello kitty cake for a birthday. About 50% of bakers have made themed cakes before. You can join them and make a custom hello kitty ice cream cake.
Making a hello kitty cake is fun and lets you show your style. It’s a great way to add joy to special moments.
This guide is for both new and experienced bakers. It covers everything from baking to decorating your cake. You’ll learn how to pick the best ingredients and bake the cake just right.
Then, you’ll see how to decorate it easily. With the right tools and practice, you can make a cake that’s both beautiful and tasty. It will make any birthday even more memorable.
Essential Ingredients and Tools for Your Hello Kitty Cake
To make a beautiful and tasty Hello Kitty cake, you need the right stuff. Whether it’s for a mothers day cake or happy birthday cupcakes, quality ingredients are key. For a giant cupcake, you’ll need more of everything.
For baking, you’ll need a mixer, measuring cups, and a whisk. For decorating, you’ll need fondant, food coloring, and various tips and brushes. Don’t forget Italian Meringue Frosting and black licorice for that Hello Kitty look.
Baking Ingredients List
- Flour
- Sugar
- Eggs
- Butter
- Milk
Required Decorating Tools
- Fondant
- Food coloring
- Tips and brushes
- Italian Meringue Frosting
- Black licorice

With these ingredients and tools, you’re ready to make a stunning Hello Kitty cake. It’s perfect for any celebration, from mothers day cake to happy birthday cupcakes and even a giant cupcake.
Preparing Your Workspace and Initial Setup
Starting your baking journey is exciting, whether it’s for a superhero cake or a gamer birthday cake. It’s key to prepare your workspace and initial setup. This ensures a smooth and efficient baking process. A tidy workspace helps you focus, making your cake both beautiful and tasty.
First, collect all needed ingredients and tools. This includes a decorating bag, a coupler, and decorating Tip #47 for designs. Organize them in a way that makes sense to you. This saves time and reduces stress.
When setting up your baking gear, think about the cake type. For a Hello Kitty cake, ensure your oven is at the right temperature. Have all necessary pans and utensils ready. A well-prepared workspace leads to a cake that’s both delicious and looks great.

Baking is about detail and fun. With a prepared workspace, you’ll enjoy making your cake. Whether it’s a superhero cake or a gamer birthday cake, get everything ready. You’ll create a cake that will surely impress.
Baking the Perfect Base for Your Hello Kitty Cake
To make a tasty and pretty Hello Kitty cake, start with a great base. This means mixing the batter, picking the right pan, and baking at the correct temperature and time. Baking well is important, whether you’re baking jumbo cupcakes or a big cake for a hello kitty bakery.
First, mix the cake batter. Use flour, sugar, eggs, and milk. Make sure the mix is just right, following the recipe closely. Then, choose a pan that fits your cake well. Grease and line it with parchment paper.
Put your cake in the oven and bake at the right temperature and time. A Hello Kitty cake usually bakes for 25-30 minutes at 350°F (175°C). Keep an eye on it and adjust the time if needed. With these tips, you’ll make a delicious and beautiful Hello Kitty cake, perfect for any event, whether you’re a pro at a hello kitty bakery or just baking for fun.

Popular Hello Kitty cake flavors are vanilla and strawberry, chocolate and raspberry, and lemon and blueberry. You can try different ingredients, like gluten-free flour or vegan options, to meet your dietary needs. With practice and patience, you’ll make a stunning and tasty Hello Kitty cake, impressing everyone, whether it’s jumbo cupcakes or a big cake for a hello kitty bakery.
Creating the Signature Hello Kitty Shape
To make the signature Hello Kitty shape, you’ll need fondant and food coloring. The body is a 3-inch pink fondant ball. The head is about 5 to 6 inches wide. You’ll also need 3 skewers, each 5 inches long, for support.
The base is a 6-inch cake circle. The head needs at least 2 days to dry before attaching it to the body. After assembly, let it dry for at least 1 week in a cool, dark place. You can use store-bought fondant, but knead it well first. Working in a cool room helps prevent the fondant from getting sticky.
Some important steps for creating the Hello Kitty shape include:
- Rolling out small pieces of white fondant into balls for the legs and tail, you will need 3 of these.
- Cutting out polka dots from white fondant, at least one is required for decoration.
- Using a hello kitty ice cream cake as inspiration for your design, you can add unique touches to make your cake stand out.
By following these steps and using the right techniques and tools, you’ll create a beautiful Hello Kitty shape. Remember to be patient and let the fondant dry completely before handling the cake. With practice and patience, you can make a stunning hello kitty cake that will impress everyone.
Making and Coloring the Perfect Frosting
Frosting is key for a hello kitty cake for birthday or a mothers day cake. You need to get the consistency and color right. For a hello kitty cake, a can of cream cheese frosting works well for a 9″ round cake. Use gel or paste food colors for bright colors, not liquid.
To get the frosting just right, follow these tips:
- Blend butter and cream cheese for a smooth texture
- Adjust the frosting’s temperature for the perfect consistency
- Use a jumbo star tip for better piping
For coloring, use a color mixing guide to find the perfect shade. When coloring large areas, slightly overlap colors to keep the frosting smooth. You can also use a thin layer of buttercream to prepare the cake before frosting.
By following these tips, you can make a stunning and tasty hello kitty cake for birthday or mothers day cake. It will wow your friends and family. Remember to keep the frosting at the right temperature and use it within a few hours for the best taste.
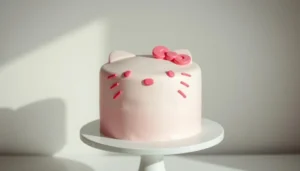
Decorating Techniques for Hello Kitty Features
Decorating your Hello Kitty cake is all about the details. You can make a happy birthday cupcakes design or a giant cupcake to be the star. Start with the face, using food coloring for the red bow and whiskers. You can also add a smile or blush to give it personality.
To enhance your cake, consider these extra details:
- Eyelashes from fondant or edible markers
- A sparkly collar or bow
- Whiskers from pulled sugar or fondant
These touches can make your cake look amazing. Remember, have fun and be creative. Don’t be afraid to try new things.
With these tips, you can make a stunning Hello Kitty cake. It will impress everyone, whether it’s happy birthday cupcakes or a giant cupcake. Just enjoy the process and let your creativity shine.
Troubleshooting Common Hello Kitty Cake Challenges
When you make a Hello Kitty cake, you might face some issues. These can be tricky, like getting the right frosting consistency or fixing mistakes. These problems can be tough, like when you’re making a cake for a big event, like a gamer birthday cake or a superhero cake.
To solve these problems, you need the right skills and tools. For instance, if your cake cracks, you can use a cake leveller or adjust your oven temperature. Also, using top-notch ingredients and a reliable recipe can help you get it just right.
Some common problems with Hello Kitty cakes include:
- Getting the frosting consistency right
- Fixing mistakes, like a cracked cake or uneven decorations
- Dealing with issues like not having the right ingredients or managing your time
With the right preparation and tools, you can beat any challenge. This way, you can make a stunning and tasty Hello Kitty cake, for any event, like a superhero cake or a gamer birthday cake.
Storage and Transportation Tips
Storing and transporting your Hello Kitty cake requires careful steps. Keep it in a cool, dry place, just like jumbo cupcakes. Use a strong cake box with mats for support when moving it to a hello kitty bakery or a party.
Chill your cake before moving it. Store it at room temperature for fondant cakes or in the fridge for buttercream cakes. Cake boards and dowels help with larger tiered cakes. These tips will help you store and transport your cake safely.
Here are some additional tips to keep in mind:
- Use a cake box designed for transporting cakes to prevent damage and keep your cake fresh.
- Keep your cake away from direct sunlight and heat sources to prevent melting or fading.
- Consider using a non-slip mat or cake stabilizer to prevent your cake from shifting during transportation.
By following these tips, you can enjoy your Hello Kitty cake at parties or celebrations. It could be a birthday, baby shower, or any special occasion. Your creative and delicious designs might even inspire others to make their own Hello Kitty cakes.
| Storage Method | Recommended Temperature |
|---|---|
| Fondant Cake | Room Temperature |
| Buttercream Cake | Refrigerated |
Conclusion: Perfecting Your Hello Kitty Cake Creation
Creating a delightful Hello Kitty cake needs careful planning and creativity. You now have the skills to impress your guests with a stunning cake. It will look great and taste even better.
The secret to a perfect Hello Kitty cake is in the details. Make sure to sculpt the face, create the perfect bow, and add whimsical whiskers. These small details will make your cake come alive and capture the essence of Hello Kitty.
Whether it’s for a hello kitty ice cream cake party or a birthday, your skills will make a masterpiece. Enjoy baking and decorating. Let your creativity shine as you turn a simple cake into a work of art.
FAQ
What are the essential ingredients and tools needed to make a Hello Kitty cake?
You’ll need flour, sugar, eggs, and other basic baking stuff. For decorating, you’ll need fondant, food coloring, and special items like Italian Meringue Frosting and black licorice.
How do I prepare my workspace and set up for baking the Hello Kitty cake?
First, organize your ingredients and tools. Then, get your baking gear ready. Make sure your workspace is clean and ready to go.
What are the steps for baking the perfect base for the Hello Kitty cake?
Start by mixing the cake batter well. Choose the right baking pan and set the oven to the perfect temperature. Timing is also key.
How do I create the signature Hello Kitty shape for the cake?
Use fondant and food coloring to make Hello Kitty’s face. You’ll need the right tools and techniques to get it just right.
How do I make and color the perfect frosting for the Hello Kitty cake?
To get the frosting right, aim for the perfect buttercream consistency. Mix the colors carefully. Store and keep the frosting at the right temperature.
What decorating techniques are used for the Hello Kitty features?
Focus on the face, bow, and whiskers. Pay attention to the details and expression to bring Hello Kitty to life.
How do I troubleshoot common challenges when making a Hello Kitty cake?
If your cake cracks or the frosting isn’t right, don’t worry. There are ways to fix these problems with the right tools and techniques.
How do I properly store and transport the finished Hello Kitty cake?
To keep your cake fresh and safe, use the right storage and transport methods. This will help it stay in top shape.